Live in 15 Minutes: Add Chatbot to Your Site, No Code & Dev Ready
Live in 15 Minutes: Add Chatbot to Your Site, No Code & Dev Ready
Insights
16 min

Live in 15 Minutes: Add Chatbot to Your Site, No Code & Dev Ready
The fastest way to add a chatbot to your website is to copy your platform’s embed snippet and paste it before the closing </body> tag, or install the CMS plugin if one exists. No-code owners should start there; developers who need deeper customization can move to an SDK or API integration once the basic widget is live.
TL;DR:
Most businesses start with a simple embed snippet or plugin, which takes less than 15 minutes to install and is suitable for basic lead capture and support.
Proper testing involves clearing cache, verifying in incognito mode, checking for blocked scripts, and confirming leads or conversations appear correctly in dashboards.
Using a backend proxy to handle API requests ensures API keys remain secure and prevents credential exposure from client-side code.
Feeding the chatbot with existing content such as product pages, FAQs, and policies speeds up training and ensures accurate, relevant answers.
No-code tools are ideal for quick deployment and low maintenance, while custom SDKs and APIs are better for complex workflows or unique brand experiences.
DroxyLaunch Customer Support Without CodeDroxy helps you deploy customizable AI agents on your website and other channels, providing instant answers while matching your brand's voice.Explore Droxy
Table of Contents
What Are the Three Ways to Add a Chatbot to a Website?
How Do You Install a Chatbot Widget With an Embed Snippet?
Installing a Chatbot on WordPress, Shopify, Wix, Squarespace, or Webflow
How Do Developers Add a Custom Chatbot Integration?
How Do You Train a Chatbot on Your Website Content?
What Should You Check Before Launching a Website Chatbot?
Is It Safe to Add a Chatbot Without Exposing API Keys?
Should You Choose No-Code or Custom for Your Chatbot?
Where Droxy Fits Into Your Chatbot Setup
Sources
What Are the Three Ways to Add a Chatbot to a Website?
Every chatbot installation boils down to three real paths, and picking the right one saves you hours of backtracking later.
Embed snippet or plugin. Copy a script tag into your site or install a plugin from your CMS marketplace. Live in under 15 minutes. Best for lead capture and basic customer support on WordPress, Shopify, Wix, Squarespace, or plain HTML sites.
No-code builder dashboard. Configure conversation flows, connect a knowledge base, and customize branding through a visual dashboard, then still deploy via the same embed snippet. Best for full customer support coverage without writing code. Works on nearly any platform, including Webflow and headless setups.
Custom API/SDK integration. Build the widget UI yourself or use an npm package, route requests through your own backend, and control every interaction detail. Best for enterprise routing, unique brand experiences, or apps built in React and Next.js.
Most businesses start with the embed snippet, since it proves value fast, then graduate to deeper customization once they know what their visitors actually ask. If you’re still deciding which functionality matters most for your goals, a decision framework for choosing a chatbot platform can help you match features to your actual traffic and conversion goals rather than guessing.
How Do You Install a Chatbot Widget With an Embed Snippet?
Nearly every widget platform generates the same basic install pattern: one or two script tags plus a container element, meant to be pasted right before </body> so the widget loads without blocking your page render. This is the universal embed pattern that vendor documentation across the industry recommends, and it’s the reason no-code installs take minutes instead of hours.
Here’s what a typical snippet looks like once you copy it from your dashboard:
Expect fields like a tenant or chatbot ID, a theme setting, a position value, and sometimes an “initially open” flag that controls whether the chat window pops open automatically on page load. Platform docs like MsgHub’s web chat widget guide walk through generating that tenant ID and wiring it into the widget config before you ever touch your site’s code.
Once it’s pasted, run through this quick checklist:
Reload the page in a private/incognito window to bypass cache.
Send three or four sample questions a real visitor would ask.
Confirm a test lead or conversation actually shows up in your dashboard inbox.
Check the browser console for blocked scripts or Content Security Policy (CSP) errors.
If the widget doesn’t appear, the usual suspects are browser cache, an ad blocker or script blocker, or a CSP header that’s rejecting the external script domain. Clearing cache and whitelisting the widget’s script domain resolves most of these.
Pro Tip: Test on mobile Safari separately from desktop Chrome. Widget rendering bugs tied to viewport height and keyboard overlap show up almost exclusively on iOS, and they’re easy to miss if you only test on your laptop.
Installing a Chatbot on WordPress, Shopify, Wix, Squarespace, or Webflow
Platform quirks trip up more installs than bad code does. Here’s what to check on each:
WordPress. Use an official plugin from the plugin directory when one exists for your chatbot provider. If not, paste the snippet into your theme’s
footer.phpor, safer, into a “custom HTML” widget or a code snippets plugin so an update doesn’t wipe your edit. A child theme protects you from losing the snippet entirely during a theme update.Shopify. Install the chatbot app from the Shopify App Store when available, since it handles permissions automatically. Otherwise, paste the snippet into
theme.liquidjust before</body>. Watch for cached storefronts, Shopify’s CDN sometimes serves a stale version for a few minutes after you save.Wix and Squarespace. Both platforms offer a site-wide custom code or HTML embed setting rather than a per-page one, use that, not the page-specific embed, or the widget only shows on one page. Publish the site after saving; changes don’t go live until you do.
Webflow. Add the snippet in Project Settings under custom code, in the “before
</body>tag” field, so it applies sitewide instead of per-page. Webflow’s own custom code documentation covers where these injection points live if you’re troubleshooting a widget that only loads on your homepage.
The single most common mistake across all five platforms: pasting the snippet into one page’s settings instead of the sitewide footer or global code area. Always click through two or three random pages after publishing to confirm the widget follows you.
How Do Developers Add a Custom Chatbot Integration?
A custom build has three pieces: a client-side widget, a backend proxy, and the AI provider’s API. The proxy exists for one non-negotiable reason: a pure front-end script that calls an AI API directly exposes your API key to anyone who opens dev tools, and that exposure is a known risk developers flag repeatedly when reviewing public-facing widget code.
For React or Next.js projects, the npm path looks roughly like this:
If you’d rather avoid a build step, the same widget usually ships as a CDN script wrapped in an IIFE (immediately invoked function expression), so the entire widget, markup, styles, and logic, injects itself with a single script tag. Open-source SDKs like the Dunefox chatbot SDK demonstrate both patterns side by side: CDN script for quick installs, npm package for component-based frameworks.
Your backend proxy, a Cloudflare Worker, Vercel Function, or Netlify Function, holds the actual API key and forwards requests to the AI provider. OpenAI’s API reference documents the request and response patterns most proxies implement, including token streaming so replies appear word by word instead of all at once.
Keep the proxy stateless where possible; store conversation history client-side or in a lightweight session store.
Lazy-load the widget script so it doesn’t compete with your largest contentful paint.
Debounce rapid user input before it hits your proxy to control API costs.
Pro Tip: Stream responses token by token instead of waiting for the full reply. Visitors tolerate a three-second wait far better when text is actively appearing than when they’re staring at a static loading spinner.
How Do You Train a Chatbot on Your Website Content?
A chatbot is only as useful as what it knows, and the fastest path to a competent bot is feeding it your existing content instead of writing new material from scratch. Quick-start guides consistently point to crawling your sitemap or uploading FAQs as the two fastest onboarding methods, and either one gets you a usable bot in under an hour.
Prioritize in this order:
Product or service pages, since these answer the questions visitors ask most.
Pricing and plan details, so the bot never guesses at a number.
Shipping, returns, and cancellation policies, the top sources of repetitive support tickets.
Contact information and scheduling or booking pages.
For documents, break long PDFs or policy pages into smaller chunks with clear headers, add metadata like category or last-updated date, and set a refresh cadence so seasonal pricing or policy changes don’t leave the bot citing outdated information. Some setups also connect automation platforms; Zapier’s chatbot integrations let you route a captured lead straight into your CRM without custom code.
Pro Tip: Upload your top 20 support tickets from the last quarter as training material before launch. Real questions expose gaps a generic FAQ page never will.
What Should You Check Before Launching a Website Chatbot?
Skipping the pre-launch check is how businesses end up with a bot that greets visitors but can’t answer a single real question. Work through this before announcing the launch:
Functional check. Confirm the greeting fires, test five to ten real questions from your knowledge base, verify a captured lead reaches your inbox or CRM, and confirm human handoff actually connects to a live agent.
Security check. Open dev tools and search your page source for any exposed API key. If you find one, your integration needs a backend proxy immediately.
Performance check. Measure page load time with and without the widget using your browser’s network tab; a well-built widget should add well under a second when loaded async.
Monitoring check. Turn on analytics for conversation volume and unanswered-question logs, enable error reporting, and know how to disable the widget in one click if something breaks post-launch.
Widget install time is one of the more consistently reported UX advantages of the embed snippet method: multiple quick-start guides confirm the process takes minutes, not hours, which is exactly why it remains the recommended first move for non-developers.
Is It Safe to Add a Chatbot Without Exposing API Keys?
It’s safe once you route every request through a server-side proxy instead of calling the AI provider directly from the browser. That single architectural choice is what separates a secure integration from one that leaks credentials to anyone who inspects your page source.
Keep API keys inside a Cloudflare Worker, Vercel Function, or Netlify Function, never in client-side JavaScript.
Avoid storing full conversation transcripts with personal information in plain, unencrypted logs; set a retention window and purge old conversations automatically.
Restrict your proxy’s CORS settings to your own domain so the endpoint can’t be called from an unrelated site.
Privacy laws vary significantly by country and by the type of personal data your chatbot collects, so treat this section as a starting checklist, not legal advice, and consult counsel about your specific obligations before launch.
Should You Choose No-Code or Custom for Your Chatbot?
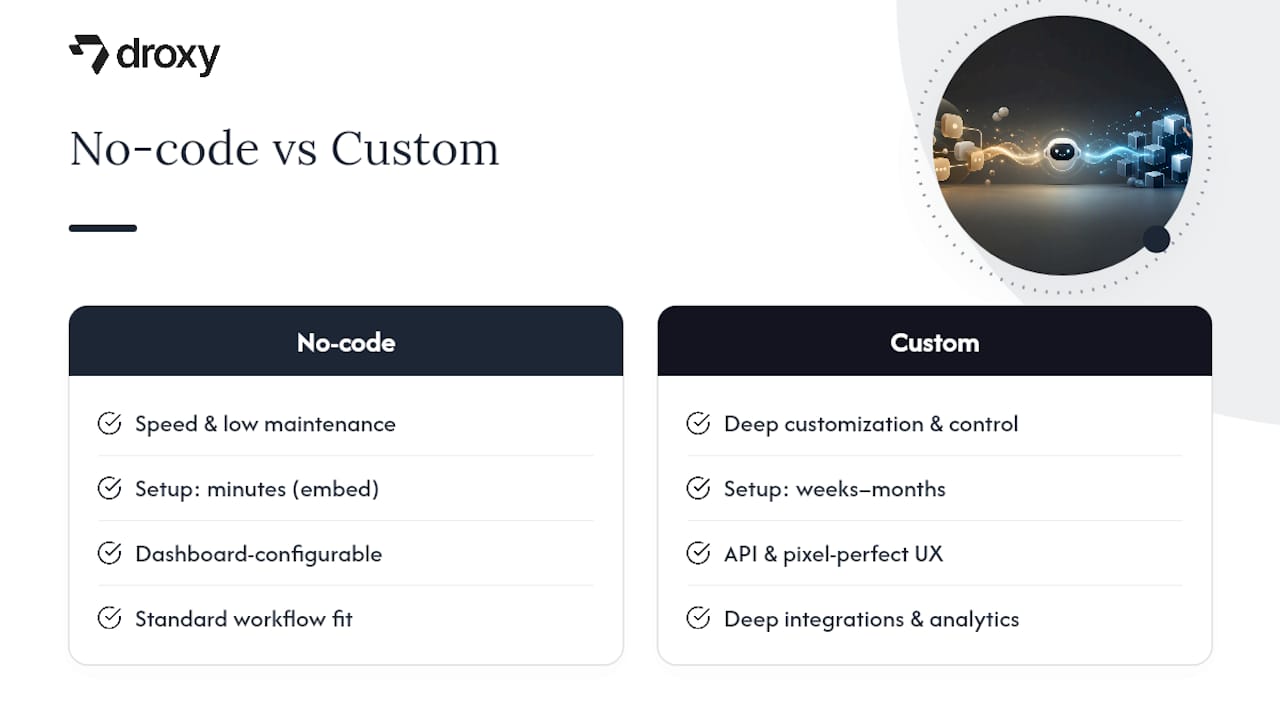
No-code wins when speed and low maintenance matter more than pixel-perfect customization. Most businesses fall into this category. Custom development earns its cost when you need deep workflow integration, unusual analytics, or a conversation experience that can’t be configured through a dashboard.
My honest read: too many teams jump straight to custom builds because it sounds more impressive, then spend months maintaining infrastructure that a no-code widget would have handled from week one. Start with the embed snippet, watch real conversations for thirty days, and only escalate to API-level control once you’ve identified a specific limitation the dashboard can’t solve. That sequencing beats guessing every time. If you’re not sure what functionality actually matters for your traffic yet, a structured comparison of chatbot capabilities is worth reading before you commit engineering time either way.
— Elena
Where Droxy Fits Into Your Chatbot Setup
Droxy gives you the embed snippet install and the no-code dashboard in one platform, so you’re not choosing between speed and control. Set up a widget for your website chat in minutes, then extend the same agent to phone, WhatsApp, Instagram, Facebook, or Shopify without rebuilding anything from scratch.
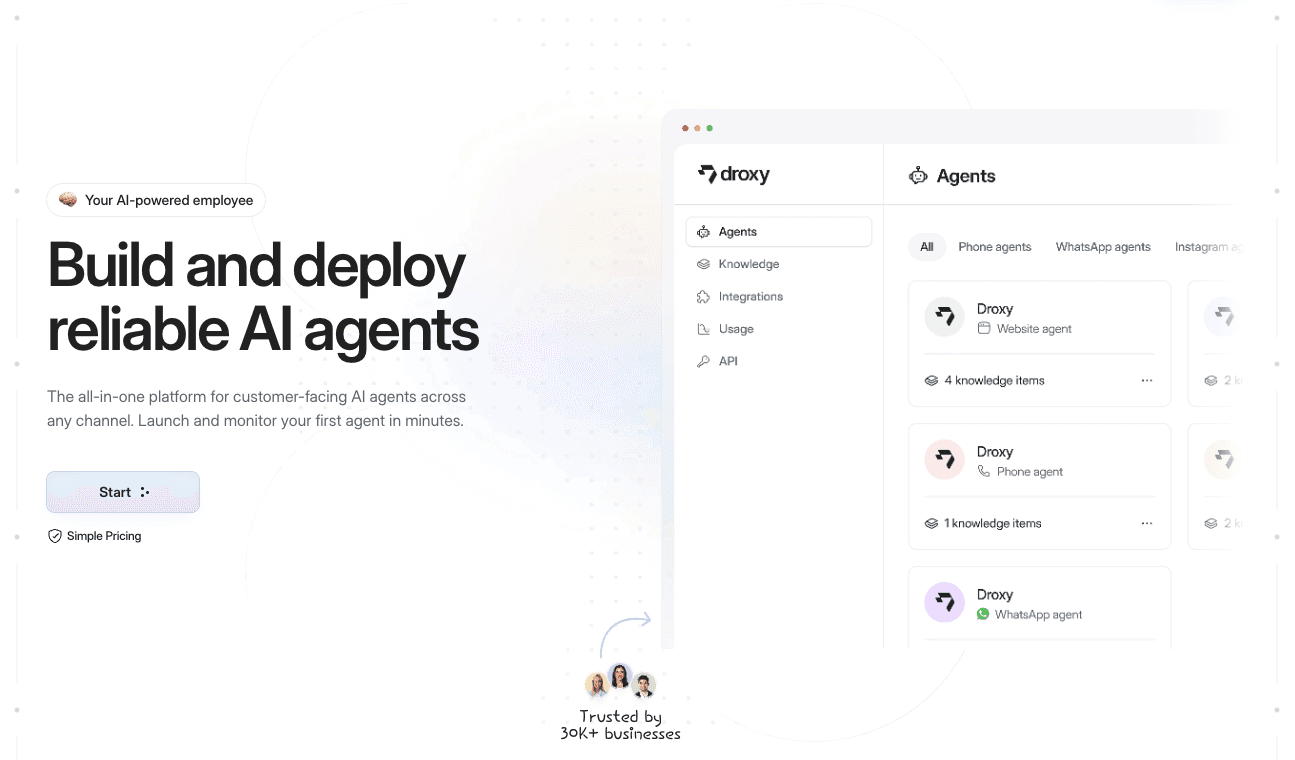
Every install path this guide covers maps to something Droxy already handles: paste the embed snippet for the fastest go-live, use the visual dashboard to connect your knowledge base and customize branding, or reach for the API and Zapier integrations when you need deeper workflow control. Many users run their customer interactions through no-code platforms, feeding them FAQs, product pages, and documents as recommended, then routing complex conversations to a human agent when needed. Agencies managing multiple client sites can also white-label the platform under their own brand. If you’re weighing WhatsApp alongside your website widget, Droxy’s WhatsApp agent runs on the same knowledge base as your site chat, no separate setup required.
Check Droxy’s pricing to see which plan fits your traffic and team size, or start a trial to see the dashboard before you paste a single line of code.
Sources
FAQ
What Is the Fastest Way to Add a Chatbot to a Website?
Copying an embed snippet into your site’s footer, right before </body>, or installing your CMS’s chatbot plugin is the fastest route, typically live within 15 minutes.
Do I Need to Know How to Code to Add a Chatbot?
No. Platforms like Droxy let you configure and deploy a chatbot through a visual dashboard, then paste one snippet into your site, with no coding required for the standard setup.
Why Do Developers Recommend a Backend Proxy for Custom Chatbots?
A backend proxy, such as a Cloudflare Worker or Vercel Function, keeps your AI provider’s API key hidden from the browser, preventing anyone from extracting it through dev tools.
How Do I Train a Chatbot on My Website’s Content?
Crawl your sitemap or upload your FAQ pages and key documents like pricing and shipping policies first, then refine answers based on real visitor questions after launch.
Can I Add a Chatbot to Shopify, Wix, or Webflow Without a Developer?
Yes. Each platform offers a site-wide custom code or app-install option built for exactly this, no developer required for the standard embed snippet install.
Recommended
Live in 15 Minutes: Add Chatbot to Your Site, No Code & Dev Ready
The fastest way to add a chatbot to your website is to copy your platform’s embed snippet and paste it before the closing </body> tag, or install the CMS plugin if one exists. No-code owners should start there; developers who need deeper customization can move to an SDK or API integration once the basic widget is live.
TL;DR:
Most businesses start with a simple embed snippet or plugin, which takes less than 15 minutes to install and is suitable for basic lead capture and support.
Proper testing involves clearing cache, verifying in incognito mode, checking for blocked scripts, and confirming leads or conversations appear correctly in dashboards.
Using a backend proxy to handle API requests ensures API keys remain secure and prevents credential exposure from client-side code.
Feeding the chatbot with existing content such as product pages, FAQs, and policies speeds up training and ensures accurate, relevant answers.
No-code tools are ideal for quick deployment and low maintenance, while custom SDKs and APIs are better for complex workflows or unique brand experiences.
DroxyLaunch Customer Support Without CodeDroxy helps you deploy customizable AI agents on your website and other channels, providing instant answers while matching your brand's voice.Explore Droxy
Table of Contents
What Are the Three Ways to Add a Chatbot to a Website?
How Do You Install a Chatbot Widget With an Embed Snippet?
Installing a Chatbot on WordPress, Shopify, Wix, Squarespace, or Webflow
How Do Developers Add a Custom Chatbot Integration?
How Do You Train a Chatbot on Your Website Content?
What Should You Check Before Launching a Website Chatbot?
Is It Safe to Add a Chatbot Without Exposing API Keys?
Should You Choose No-Code or Custom for Your Chatbot?
Where Droxy Fits Into Your Chatbot Setup
Sources
What Are the Three Ways to Add a Chatbot to a Website?
Every chatbot installation boils down to three real paths, and picking the right one saves you hours of backtracking later.
Embed snippet or plugin. Copy a script tag into your site or install a plugin from your CMS marketplace. Live in under 15 minutes. Best for lead capture and basic customer support on WordPress, Shopify, Wix, Squarespace, or plain HTML sites.
No-code builder dashboard. Configure conversation flows, connect a knowledge base, and customize branding through a visual dashboard, then still deploy via the same embed snippet. Best for full customer support coverage without writing code. Works on nearly any platform, including Webflow and headless setups.
Custom API/SDK integration. Build the widget UI yourself or use an npm package, route requests through your own backend, and control every interaction detail. Best for enterprise routing, unique brand experiences, or apps built in React and Next.js.
Most businesses start with the embed snippet, since it proves value fast, then graduate to deeper customization once they know what their visitors actually ask. If you’re still deciding which functionality matters most for your goals, a decision framework for choosing a chatbot platform can help you match features to your actual traffic and conversion goals rather than guessing.
How Do You Install a Chatbot Widget With an Embed Snippet?
Nearly every widget platform generates the same basic install pattern: one or two script tags plus a container element, meant to be pasted right before </body> so the widget loads without blocking your page render. This is the universal embed pattern that vendor documentation across the industry recommends, and it’s the reason no-code installs take minutes instead of hours.
Here’s what a typical snippet looks like once you copy it from your dashboard:
Expect fields like a tenant or chatbot ID, a theme setting, a position value, and sometimes an “initially open” flag that controls whether the chat window pops open automatically on page load. Platform docs like MsgHub’s web chat widget guide walk through generating that tenant ID and wiring it into the widget config before you ever touch your site’s code.
Once it’s pasted, run through this quick checklist:
Reload the page in a private/incognito window to bypass cache.
Send three or four sample questions a real visitor would ask.
Confirm a test lead or conversation actually shows up in your dashboard inbox.
Check the browser console for blocked scripts or Content Security Policy (CSP) errors.
If the widget doesn’t appear, the usual suspects are browser cache, an ad blocker or script blocker, or a CSP header that’s rejecting the external script domain. Clearing cache and whitelisting the widget’s script domain resolves most of these.
Pro Tip: Test on mobile Safari separately from desktop Chrome. Widget rendering bugs tied to viewport height and keyboard overlap show up almost exclusively on iOS, and they’re easy to miss if you only test on your laptop.
Installing a Chatbot on WordPress, Shopify, Wix, Squarespace, or Webflow
Platform quirks trip up more installs than bad code does. Here’s what to check on each:
WordPress. Use an official plugin from the plugin directory when one exists for your chatbot provider. If not, paste the snippet into your theme’s
footer.phpor, safer, into a “custom HTML” widget or a code snippets plugin so an update doesn’t wipe your edit. A child theme protects you from losing the snippet entirely during a theme update.Shopify. Install the chatbot app from the Shopify App Store when available, since it handles permissions automatically. Otherwise, paste the snippet into
theme.liquidjust before</body>. Watch for cached storefronts, Shopify’s CDN sometimes serves a stale version for a few minutes after you save.Wix and Squarespace. Both platforms offer a site-wide custom code or HTML embed setting rather than a per-page one, use that, not the page-specific embed, or the widget only shows on one page. Publish the site after saving; changes don’t go live until you do.
Webflow. Add the snippet in Project Settings under custom code, in the “before
</body>tag” field, so it applies sitewide instead of per-page. Webflow’s own custom code documentation covers where these injection points live if you’re troubleshooting a widget that only loads on your homepage.
The single most common mistake across all five platforms: pasting the snippet into one page’s settings instead of the sitewide footer or global code area. Always click through two or three random pages after publishing to confirm the widget follows you.
How Do Developers Add a Custom Chatbot Integration?
A custom build has three pieces: a client-side widget, a backend proxy, and the AI provider’s API. The proxy exists for one non-negotiable reason: a pure front-end script that calls an AI API directly exposes your API key to anyone who opens dev tools, and that exposure is a known risk developers flag repeatedly when reviewing public-facing widget code.
For React or Next.js projects, the npm path looks roughly like this:
If you’d rather avoid a build step, the same widget usually ships as a CDN script wrapped in an IIFE (immediately invoked function expression), so the entire widget, markup, styles, and logic, injects itself with a single script tag. Open-source SDKs like the Dunefox chatbot SDK demonstrate both patterns side by side: CDN script for quick installs, npm package for component-based frameworks.
Your backend proxy, a Cloudflare Worker, Vercel Function, or Netlify Function, holds the actual API key and forwards requests to the AI provider. OpenAI’s API reference documents the request and response patterns most proxies implement, including token streaming so replies appear word by word instead of all at once.
Keep the proxy stateless where possible; store conversation history client-side or in a lightweight session store.
Lazy-load the widget script so it doesn’t compete with your largest contentful paint.
Debounce rapid user input before it hits your proxy to control API costs.
Pro Tip: Stream responses token by token instead of waiting for the full reply. Visitors tolerate a three-second wait far better when text is actively appearing than when they’re staring at a static loading spinner.
How Do You Train a Chatbot on Your Website Content?
A chatbot is only as useful as what it knows, and the fastest path to a competent bot is feeding it your existing content instead of writing new material from scratch. Quick-start guides consistently point to crawling your sitemap or uploading FAQs as the two fastest onboarding methods, and either one gets you a usable bot in under an hour.
Prioritize in this order:
Product or service pages, since these answer the questions visitors ask most.
Pricing and plan details, so the bot never guesses at a number.
Shipping, returns, and cancellation policies, the top sources of repetitive support tickets.
Contact information and scheduling or booking pages.
For documents, break long PDFs or policy pages into smaller chunks with clear headers, add metadata like category or last-updated date, and set a refresh cadence so seasonal pricing or policy changes don’t leave the bot citing outdated information. Some setups also connect automation platforms; Zapier’s chatbot integrations let you route a captured lead straight into your CRM without custom code.
Pro Tip: Upload your top 20 support tickets from the last quarter as training material before launch. Real questions expose gaps a generic FAQ page never will.
What Should You Check Before Launching a Website Chatbot?
Skipping the pre-launch check is how businesses end up with a bot that greets visitors but can’t answer a single real question. Work through this before announcing the launch:
Functional check. Confirm the greeting fires, test five to ten real questions from your knowledge base, verify a captured lead reaches your inbox or CRM, and confirm human handoff actually connects to a live agent.
Security check. Open dev tools and search your page source for any exposed API key. If you find one, your integration needs a backend proxy immediately.
Performance check. Measure page load time with and without the widget using your browser’s network tab; a well-built widget should add well under a second when loaded async.
Monitoring check. Turn on analytics for conversation volume and unanswered-question logs, enable error reporting, and know how to disable the widget in one click if something breaks post-launch.
Widget install time is one of the more consistently reported UX advantages of the embed snippet method: multiple quick-start guides confirm the process takes minutes, not hours, which is exactly why it remains the recommended first move for non-developers.
Is It Safe to Add a Chatbot Without Exposing API Keys?
It’s safe once you route every request through a server-side proxy instead of calling the AI provider directly from the browser. That single architectural choice is what separates a secure integration from one that leaks credentials to anyone who inspects your page source.
Keep API keys inside a Cloudflare Worker, Vercel Function, or Netlify Function, never in client-side JavaScript.
Avoid storing full conversation transcripts with personal information in plain, unencrypted logs; set a retention window and purge old conversations automatically.
Restrict your proxy’s CORS settings to your own domain so the endpoint can’t be called from an unrelated site.
Privacy laws vary significantly by country and by the type of personal data your chatbot collects, so treat this section as a starting checklist, not legal advice, and consult counsel about your specific obligations before launch.
Should You Choose No-Code or Custom for Your Chatbot?
No-code wins when speed and low maintenance matter more than pixel-perfect customization. Most businesses fall into this category. Custom development earns its cost when you need deep workflow integration, unusual analytics, or a conversation experience that can’t be configured through a dashboard.
My honest read: too many teams jump straight to custom builds because it sounds more impressive, then spend months maintaining infrastructure that a no-code widget would have handled from week one. Start with the embed snippet, watch real conversations for thirty days, and only escalate to API-level control once you’ve identified a specific limitation the dashboard can’t solve. That sequencing beats guessing every time. If you’re not sure what functionality actually matters for your traffic yet, a structured comparison of chatbot capabilities is worth reading before you commit engineering time either way.
— Elena
Where Droxy Fits Into Your Chatbot Setup
Droxy gives you the embed snippet install and the no-code dashboard in one platform, so you’re not choosing between speed and control. Set up a widget for your website chat in minutes, then extend the same agent to phone, WhatsApp, Instagram, Facebook, or Shopify without rebuilding anything from scratch.
Every install path this guide covers maps to something Droxy already handles: paste the embed snippet for the fastest go-live, use the visual dashboard to connect your knowledge base and customize branding, or reach for the API and Zapier integrations when you need deeper workflow control. Many users run their customer interactions through no-code platforms, feeding them FAQs, product pages, and documents as recommended, then routing complex conversations to a human agent when needed. Agencies managing multiple client sites can also white-label the platform under their own brand. If you’re weighing WhatsApp alongside your website widget, Droxy’s WhatsApp agent runs on the same knowledge base as your site chat, no separate setup required.
Check Droxy’s pricing to see which plan fits your traffic and team size, or start a trial to see the dashboard before you paste a single line of code.
Sources
FAQ
What Is the Fastest Way to Add a Chatbot to a Website?
Copying an embed snippet into your site’s footer, right before </body>, or installing your CMS’s chatbot plugin is the fastest route, typically live within 15 minutes.
Do I Need to Know How to Code to Add a Chatbot?
No. Platforms like Droxy let you configure and deploy a chatbot through a visual dashboard, then paste one snippet into your site, with no coding required for the standard setup.
Why Do Developers Recommend a Backend Proxy for Custom Chatbots?
A backend proxy, such as a Cloudflare Worker or Vercel Function, keeps your AI provider’s API key hidden from the browser, preventing anyone from extracting it through dev tools.
How Do I Train a Chatbot on My Website’s Content?
Crawl your sitemap or upload your FAQ pages and key documents like pricing and shipping policies first, then refine answers based on real visitor questions after launch.
Can I Add a Chatbot to Shopify, Wix, or Webflow Without a Developer?
Yes. Each platform offers a site-wide custom code or app-install option built for exactly this, no developer required for the standard embed snippet install.
Recommended


🚀
Powered by Droxy
Turn every interaction into a conversion
Customer facing AI agents that engage, convert, and support so you can scale what matters.
✨
Learn more
Recent posts
Insights
3 min read
Introducing Agent Memories
Improve your agents' performance with Agent Memories. Prevent agents from repeating the same mistakes by giving them feedback.
Read more

Insights
15 min read
HVAC Marketing in 2025: The Definitive Lead Gen Guide
Discover 15 proven HVAC marketing strategies, plus learn how Droxy's AI website agent converts curious visitors into qualified leads by answering their questions instantly - right when they're most interested in your services.
Read more
Insights
10 min read
10 Best AI Sales Agents in 2025: Tested & Ranked
Discover the top 10 AI sales agents of 2025, designed to enhance lead generation, personalize outreach, and ultimately, close more deals
Read more
Insights
3 min read
Introducing Agent Memories
Improve your agents' performance with Agent Memories. Prevent agents from repeating the same mistakes by giving them feedback.
Read more
Insights
15 min read
HVAC Marketing in 2025: The Definitive Lead Gen Guide
Discover 15 proven HVAC marketing strategies, plus learn how Droxy's AI website agent converts curious visitors into qualified leads by answering their questions instantly - right when they're most interested in your services.
Read more